Rocket Broadcaster is a streaming encoder for Windows. It takes your microphone, your sound card and even the sound of other programs on your computer, and sends them to your station. It has a built-in Test Stream button that checks your details before you go live. This guide covers installing it, entering your Icecast connection details and going live.
Before you start. Editions. Rocket Broadcaster needs Windows 7 or later. Its free edition allows one stream at up to 128 kbps with a 20-second delay before it reconnects, and AAC formats need the paid edition. The paid edition allows bitrates from 32 to 320 kbps. That means the free edition suits a Starter plan at 128 kbps, and you need the paid edition to use the higher bitrates on Large, Pro or Enterprise. Check current prices on rocketbroadcaster.com.
A Windows encoder that sends your microphone, sound card and other programs to your station. A free edition is available.
Where to find your connection details
Every program on this page needs the same five details to reach your station: a server address, a port, a username, a password and a mount point. You copy them from your control panel. It takes about a minute, and you only need to do it once for each program.
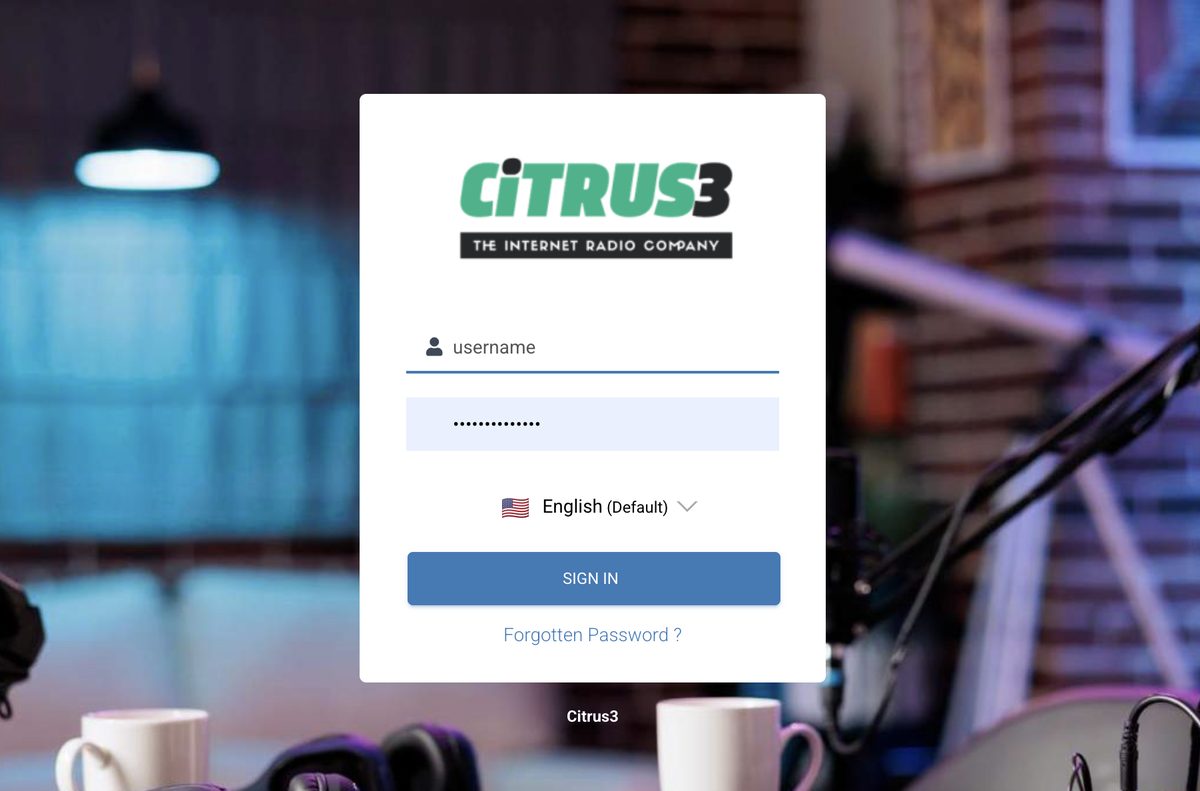
1. Log in to your control panel
Use the control panel link and the username and password from your welcome email.
2. Go to the dashboard and click How to connect
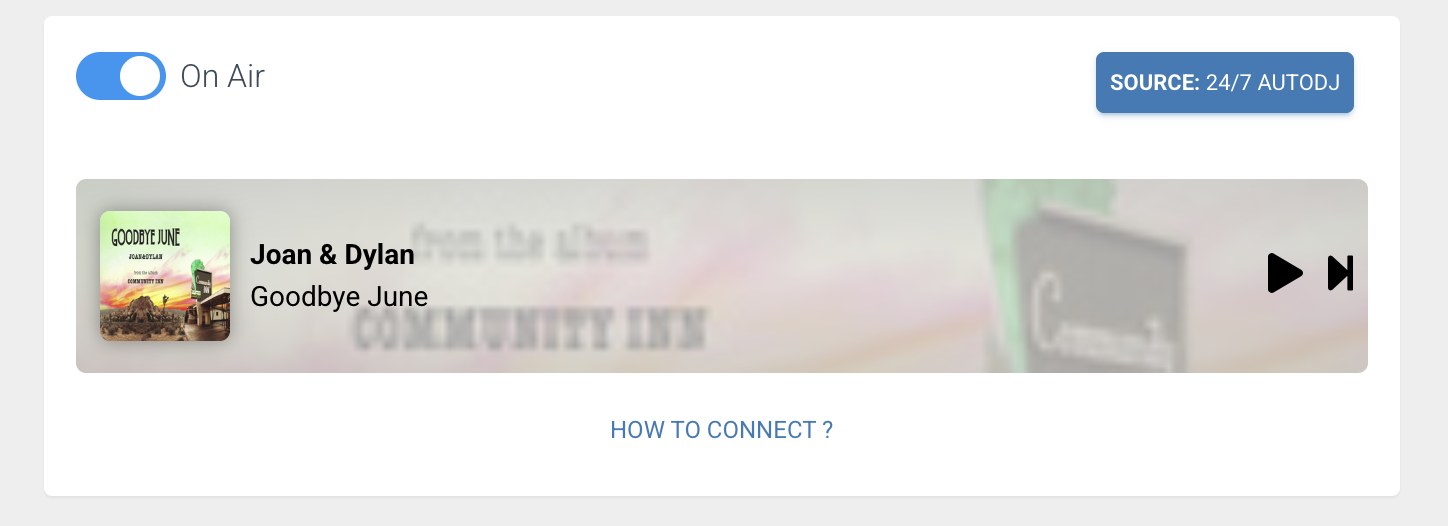
After you sign in you arrive at the main dashboard. Next to the preview player you will see a blue link called How to connect. Click it.
3. Copy your five details
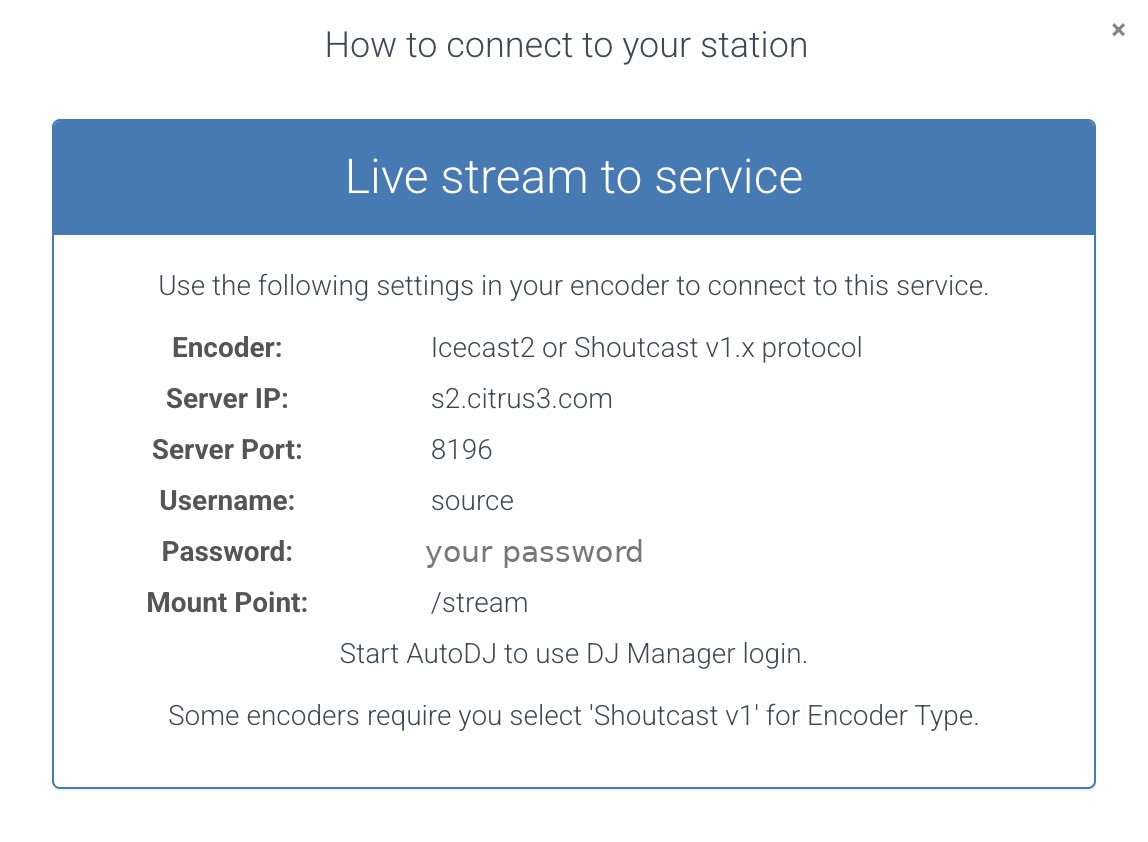
A window opens with your connection details. Keep it open while you set up your software.
| The window shows | What it is, and what your software may call it |
|---|---|
| Server IP | Where your station lives. In your software this may be called Address, Host, Hostname, Server or Server URL. Enter the address only, with no http://. |
| Server Port | The port number. Your software calls it Port. |
| Username | Called Username, User, Login or Encoder username. It is often source, but use the one shown on your dashboard. |
| Password | Your source password for broadcasting. Your software may call it Password or Encoder password. It is not the password you use to log in to the control panel. |
| Mount Point | The stream path. Your software may call it Mount, Mountpoint or Stream path. Copy it exactly, including the slash at the start, for example /stream. |
- The window says Icecast2 or Shoutcast v1.x. Always choose Icecast (or Icecast 2) as the type in your software.
- It also says Start AutoDJ to use DJ Manager login. That only matters if you use separate DJ accounts. Your station’s AutoDJ must be running for those logins to work.
- Copy and paste each value instead of typing it, and keep your password private.
- When you connect, your live broadcast interrupts your AutoDJ programming. When you disconnect, the AutoDJ resumes by itself.
Steps
- Go to rocketbroadcaster.com, open the download page and download the Windows installer. The free edition is available there, and the paid edition can be bought from the same site.
- Run the installer and follow the wizard, then open Rocket Broadcaster.
- Log in to your control panel. On the dashboard, click the How to connect link next to the preview player and keep that page open. You will copy five details from it: the server IP, port, username, password and mount point. The pictures at the top of this page show where to look.
- In Rocket Broadcaster, open Options then Preferences. Choose your Playback device and set the Sample rate to 44100. If you use a microphone or line-in, choose it as your Input device. If any field is blank, choose a valid option.
- To broadcast the sound of other programs on your computer, such as a music player, go to the System Audio Capture settings in Preferences and choose System Default. Rocket mixes that audio with your microphone.
- On the main window, play something and check the master level meter moves. If it does not, choose a different playback device.
- Open Broadcast then Streams. The Streams window opens.
- Enter a Name for your stream, such as your station name.
- Set Server Type to Icecast 2. Do not choose the SSL option or any of the Shoutcast options.
- Enter your server IP in Hostname or IP and your Port.
- Enter your Mount exactly as shown in How to connect, including the leading slash.
- Enter your Username and Password from How to connect.
- Choose an Audio Codec preset such as MP3, or click Customize to set the Codec, Bitrate, Channels (Stereo) and Samplerate (44100) yourself. Choose a bitrate within your plan.
- Click Advanced then Edit Metadata to add your station’s genre, description and website. Tick Private stream if you do not want it listed in public directories. These details are sent when the stream connects, so set them before you go live.
- Click Test Stream. Rocket checks your internet connection, finds the server, connects to the port and tests your username and password. Fix anything it reports, then click OK to save the stream.
- Click Start Broadcast in the main window. When it shows On Air, you are live and your AutoDJ is interrupted.
- To finish, click Stop Broadcast. Your AutoDJ resumes automatically.
Settings at a glance
| Setting | What to enter |
|---|---|
| Server Type | Icecast 2 |
| Hostname or IP | Your server IP from How to connect |
| Port | Your port |
| Mount | Your mount point, starting with a slash |
| Username | The username shown in How to connect |
| Password | Your source password |
| Codec / bitrate | MP3, up to your plan’s bitrate: 128 kbps on Starter, 256 kbps on Large and Pro, 320 kbps on Enterprise |
| Sample rate / channels | 44100 Hz / Stereo |
Showing the song title
If you play music from a program such as Mixxx, VirtualDJ or an automation program, Rocket Broadcaster can pass the track artist and title to listeners. Open Broadcast then Metadata Capture and choose your program. The settings depend on the program, so see Rocket Broadcaster’s metadata help on its website. You can also type the title by hand on the main window.
Check that it is working
Open your radio page, or press play on the preview player on your dashboard, and listen. Expect a delay of a few seconds between what you do and what you hear, because every internet stream has some. For the most honest test, listen on a phone over mobile data. If you can hear your show, you are live, and your AutoDJ is paused until you disconnect.
Troubleshooting
- Test Stream reports a problem. It tells you whether the problem is your internet connection, the server name, the port, or the username and password. Fix that item and test again.
- It says a stream error occurred. A typo in the stream settings is the most common cause. Compare each field with How to connect.
- It will not connect. Open How to connect again and compare every field character by character, or copy and paste each one. The server must be entered as an address or IP only, with no
http://, and a mount point must begin with a slash. - It says the password is wrong. Use the source password shown in How to connect, not your control panel login password.
- It connects but listeners hear nothing. The program is sending silence. Check that the right input is selected, that the level meters move, and that nothing is muted.
- The audio stutters or drops. Your upload connection is the usual cause. Close video calls, cloud backups and other uploads, use a cable instead of Wi-Fi, and try a lower bitrate.
- The audio sounds too fast, slow or distorted. Make the sample rate the same everywhere (44100 Hz is the safe choice) and keep your levels out of the red.
- My AutoDJ did not come back. Make sure the program has fully disconnected, then wait a short while. If the station is still silent, email support@citrus3.zendesk.com.
- Choose Icecast 2, not a Shoutcast type. The Stream ID box is for Shoutcast and is not used.
- The free edition limits you to 128 kbps. Use the paid edition if your plan allows a higher bitrate.
- Keep your connection details private.
When you stop broadcasting, your AutoDJ continues the programme.
Need a hand?
We typically reply within a few hours on weekdays (9:00 AM to 5:00 PM UK time).
Contact usNext guide: Broadcast live with MB Recaster